
Ingredients
Method
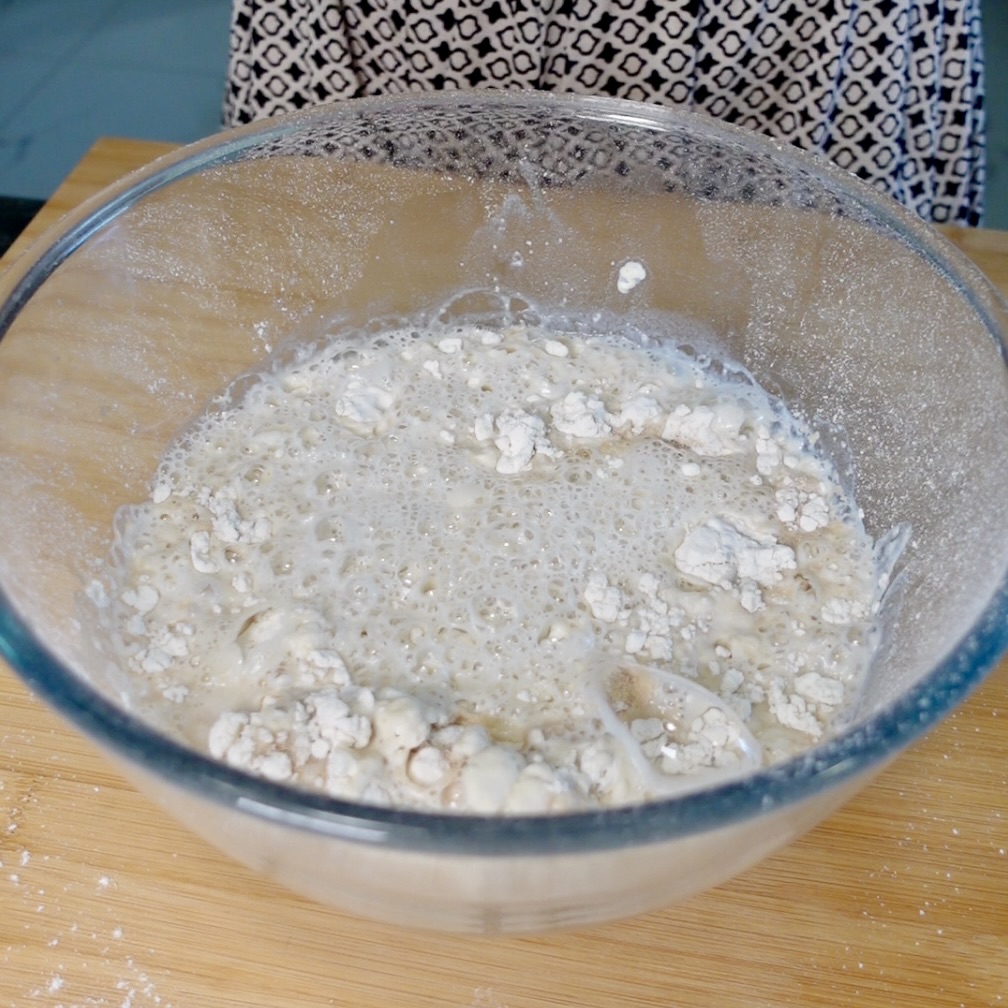
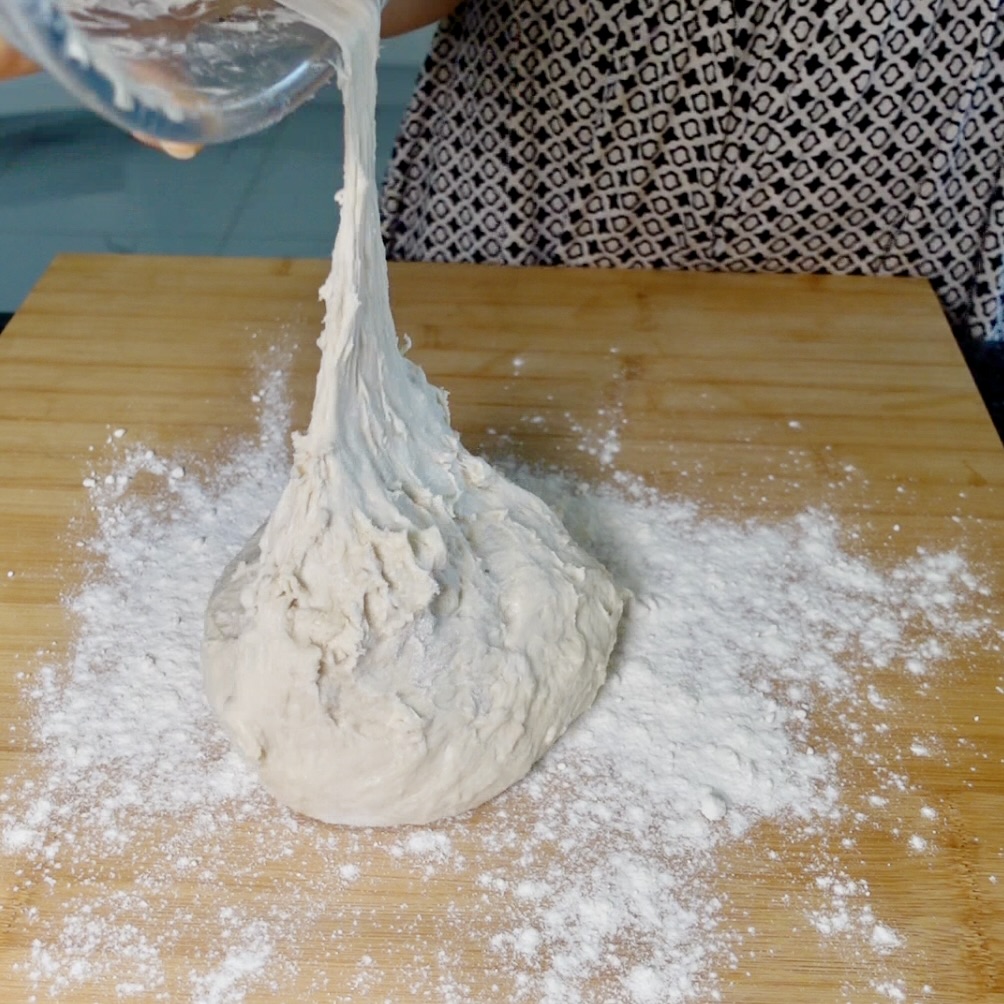
- Whisk the flour, yeast, and salt together. Add the water and mix to combine (I use my hands to do this, but you can use a spoon or spatula). The dough will be very sticky, so don’t be tempted to add more flour.
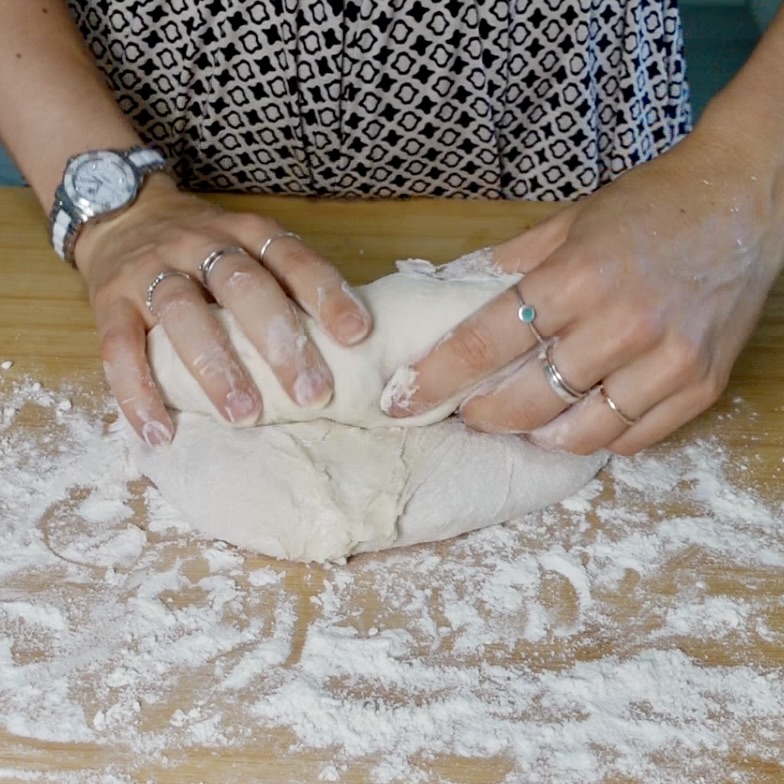
- Add about a tbsp of flour onto a clean bench, and work the dough into a smooth ball. This dough doesn’t need to be kneaded, so don’t worry about doing anything other than making sure the dough it thoroughly combined.
- Add the dough back into the bowl, cover in cling film and allow it to rise at room temperature for at least 50 minutes. NOTE: This step is just about adding flavour to the dough by allowing the yeast to react, so the time doesn’t really matter here. At this stage, you can even leave it in the fridge for up to 3 days to develop further.
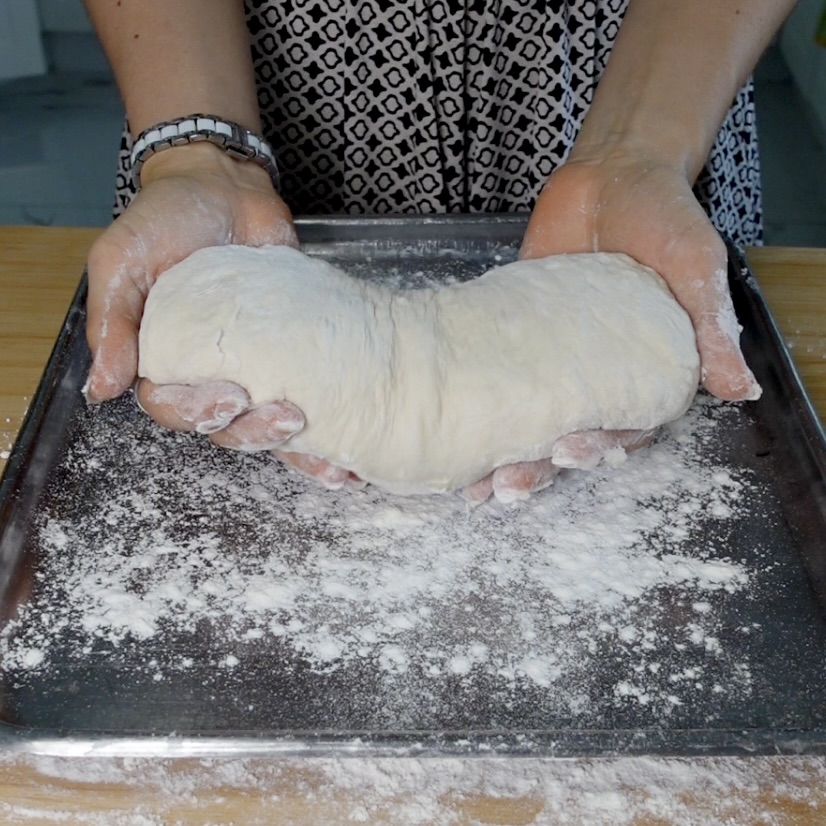
- Lightly dust a baking sheet with flour or cornmeal and a clean workbench with flour.
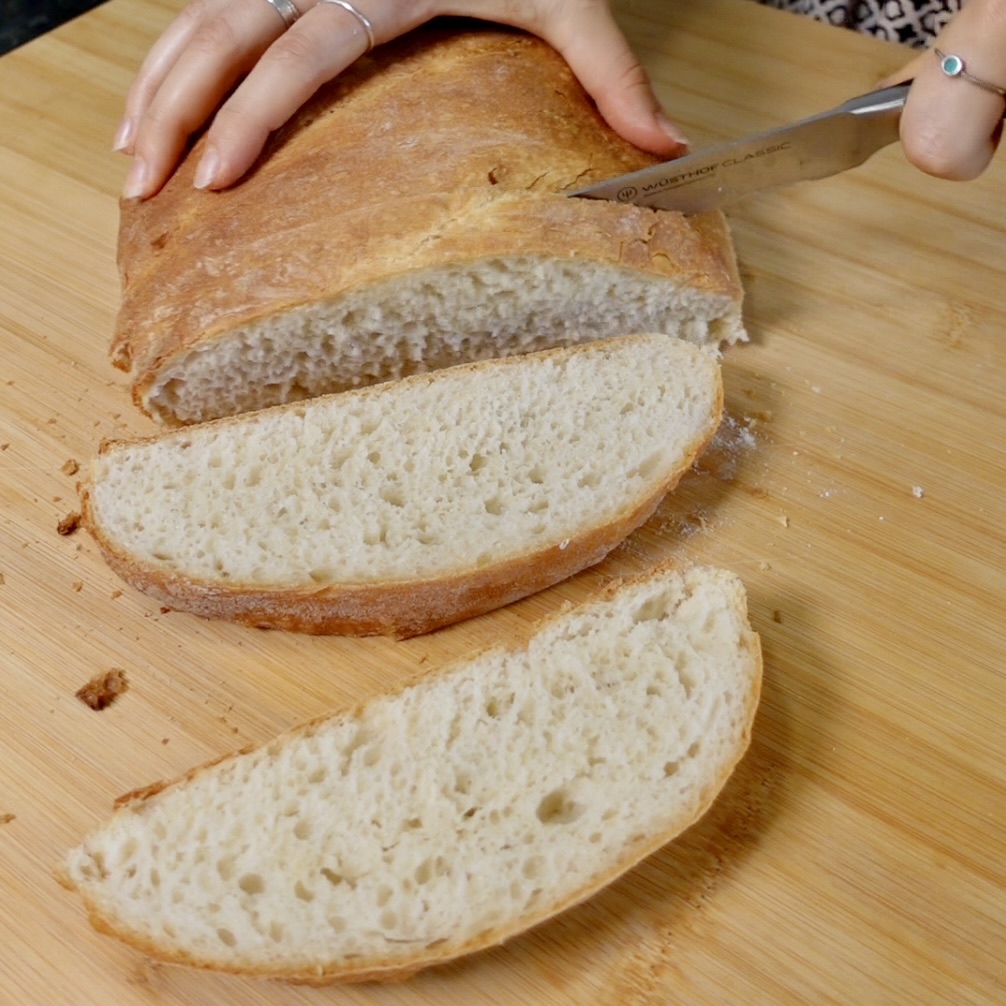
- Tip the dough out onto the bench and cut into halves. Flatten the dough to about 1-2 cm thick and roll each piece into a log shape, then place both onto the prepared baking sheet. Cover with a tea towel and allow the loaves to rise again for 45 minutes.
- Preheat the oven to 250C. NOTE: if you want an even crispier crust, place a small tray of boiling water into the base of the oven (once it has been preheated and just before adding the bread).
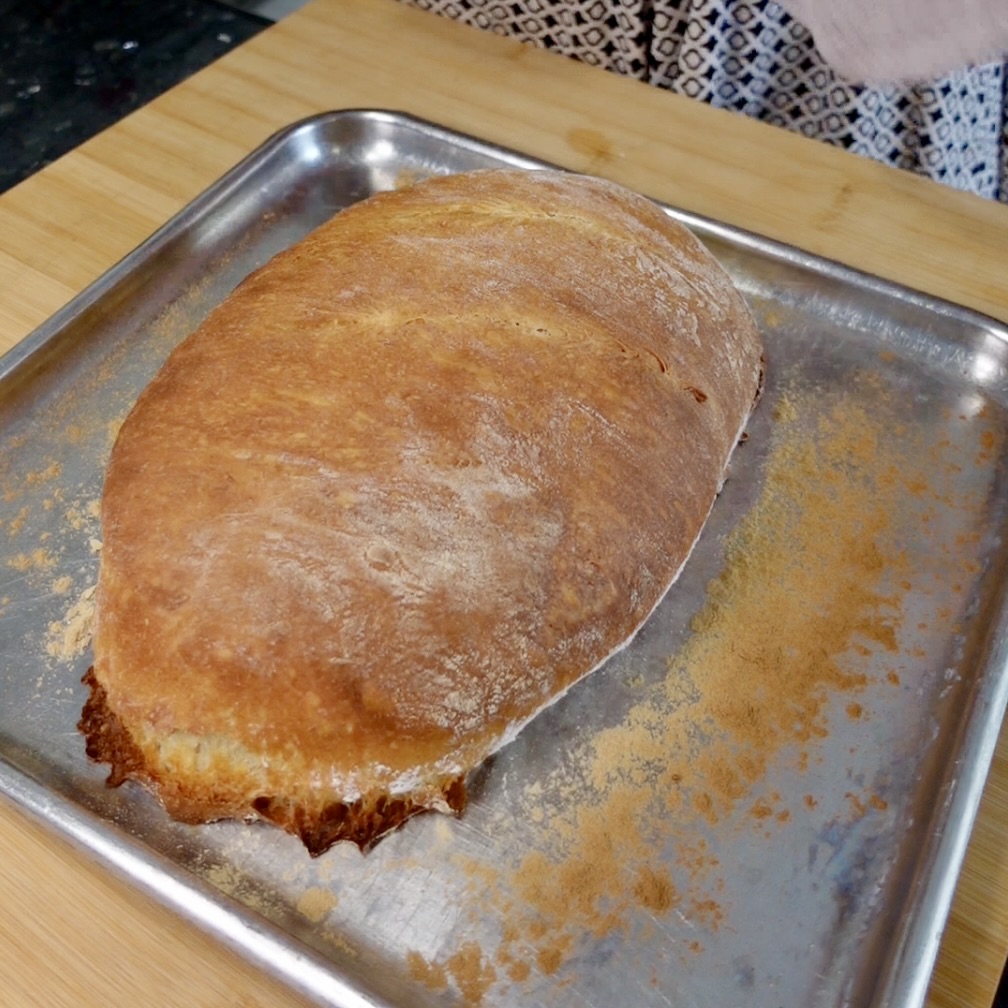
- Place the tray into the oven on the centre rack. Bake for 20-25 minutes or until the crust is golden brown. You will know they are cooked with they sound hollow when you tap them. You can also check them with a thermometer to be extra certain, and if they are at least 90C in the centre, they're done.
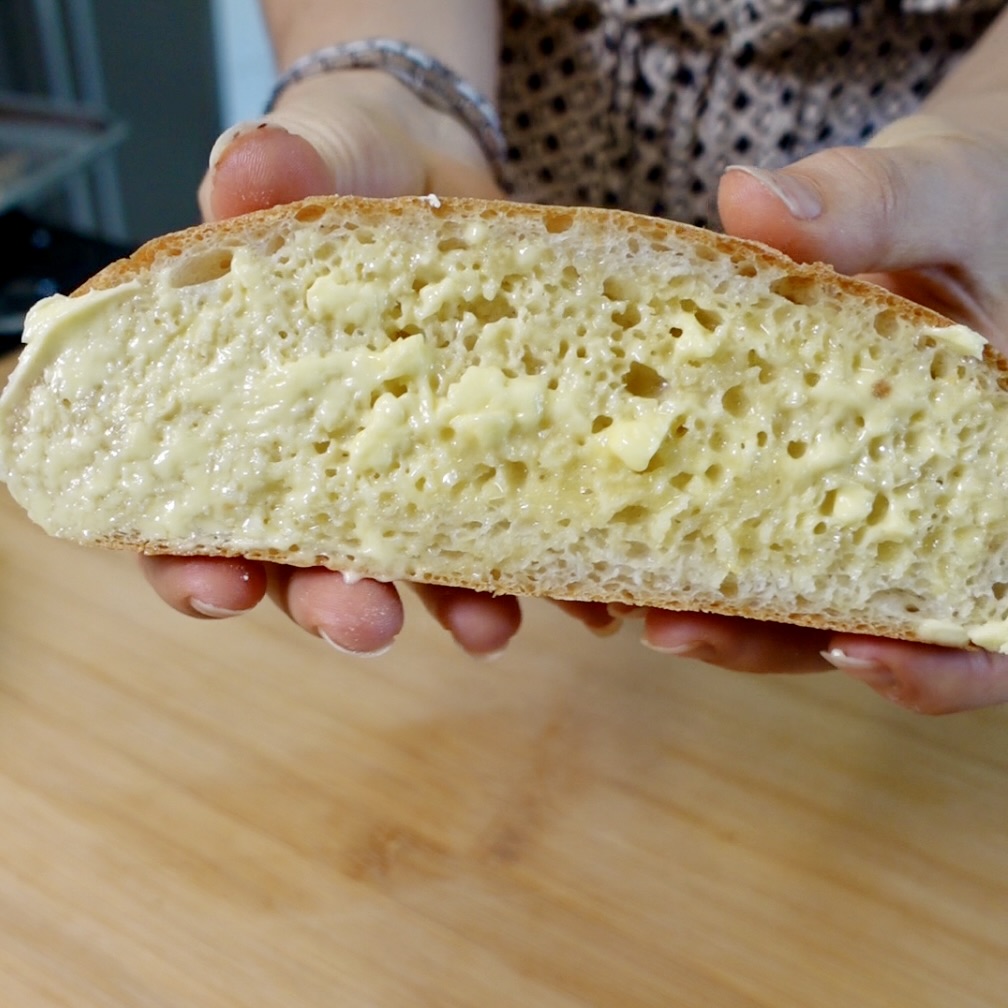
- Allow the bread to cool for at least 10 minutes before slicing.
For the butter:
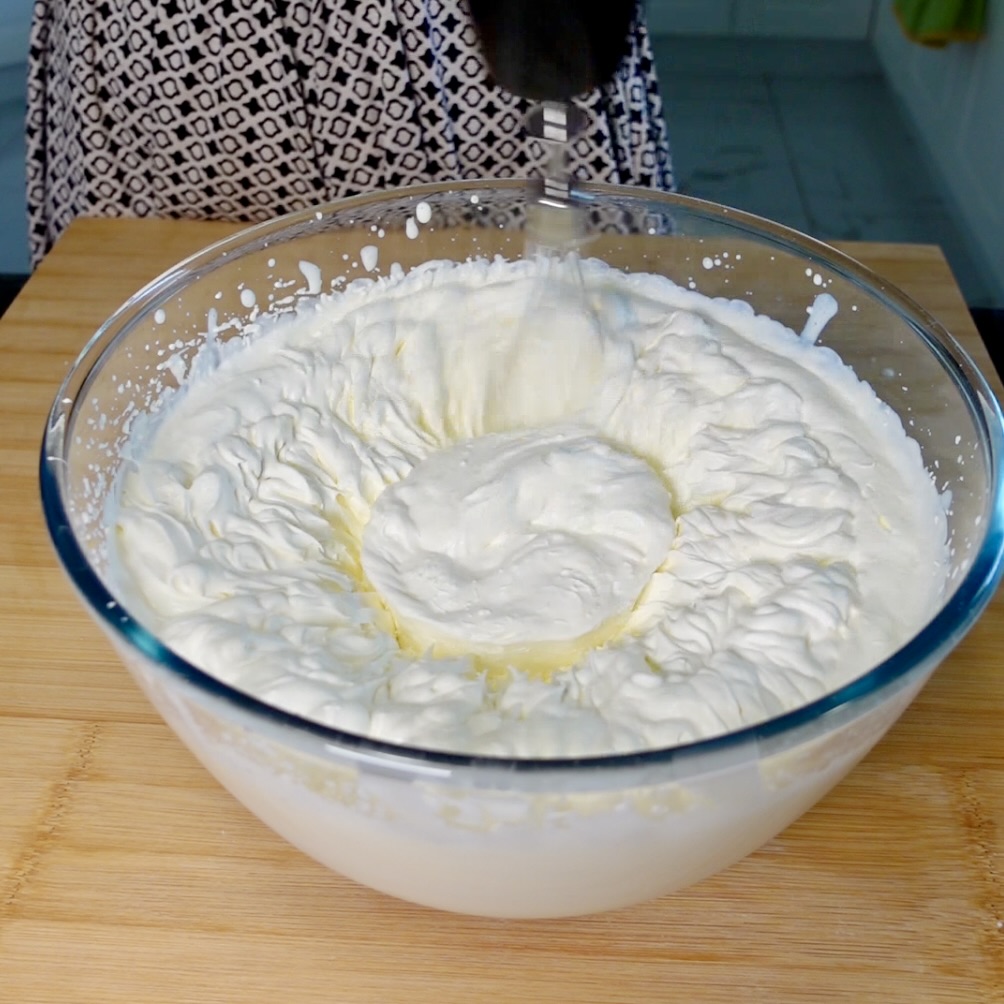
- Add cream to a bowl of a stand mixer and whisk on high until you reach stiff peaks.
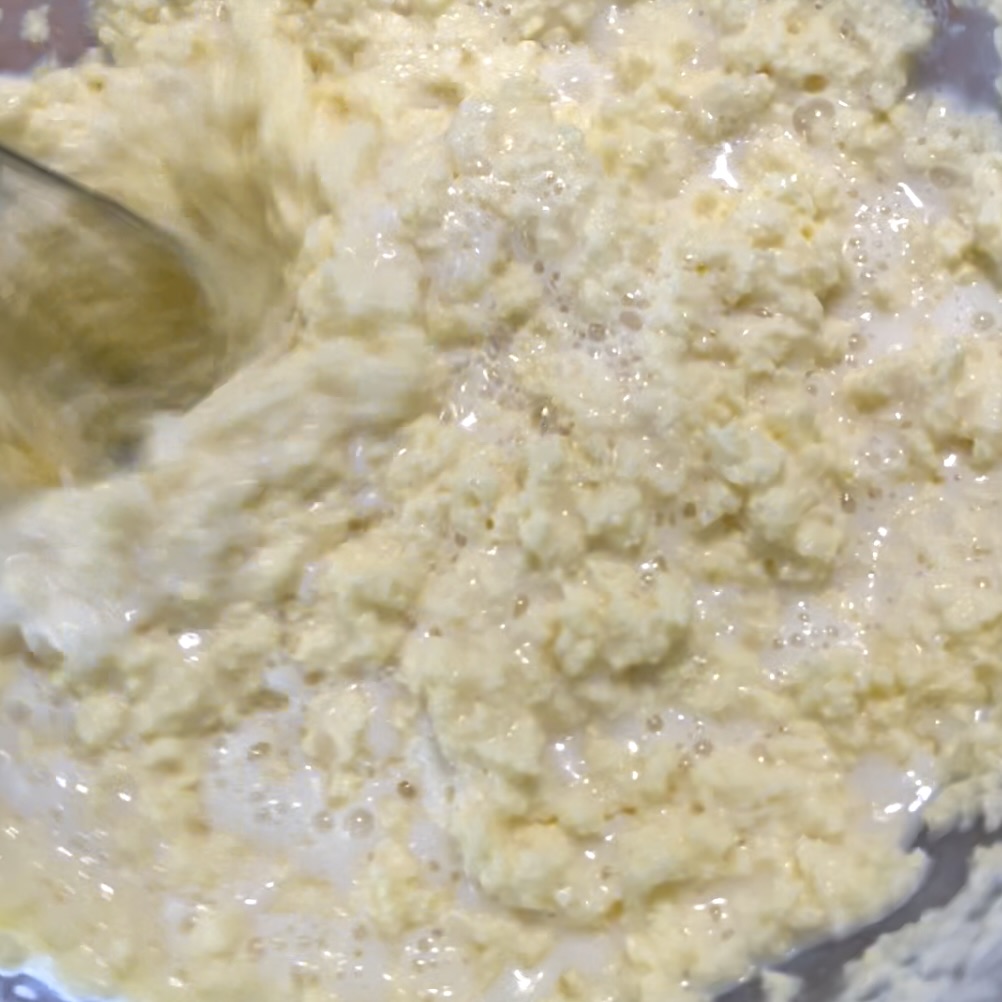
- Turn the mixer down to medium and continue to whisk for about 8 minutes (the timing will depend on a lot of things like temperature, mixer speed and the cream you use, so this is only a guide), or until you notice to butterfat separating from the buttermilk. Continue to whisk for another minute on low.
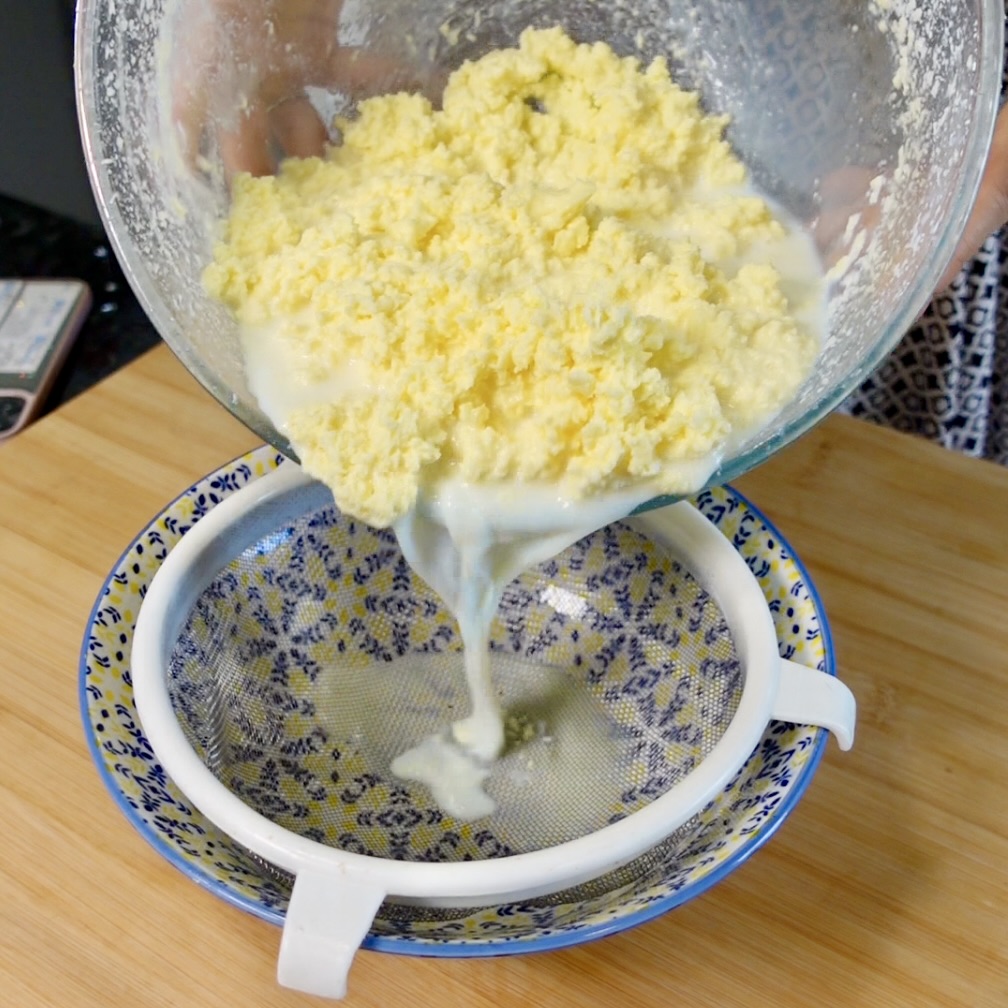
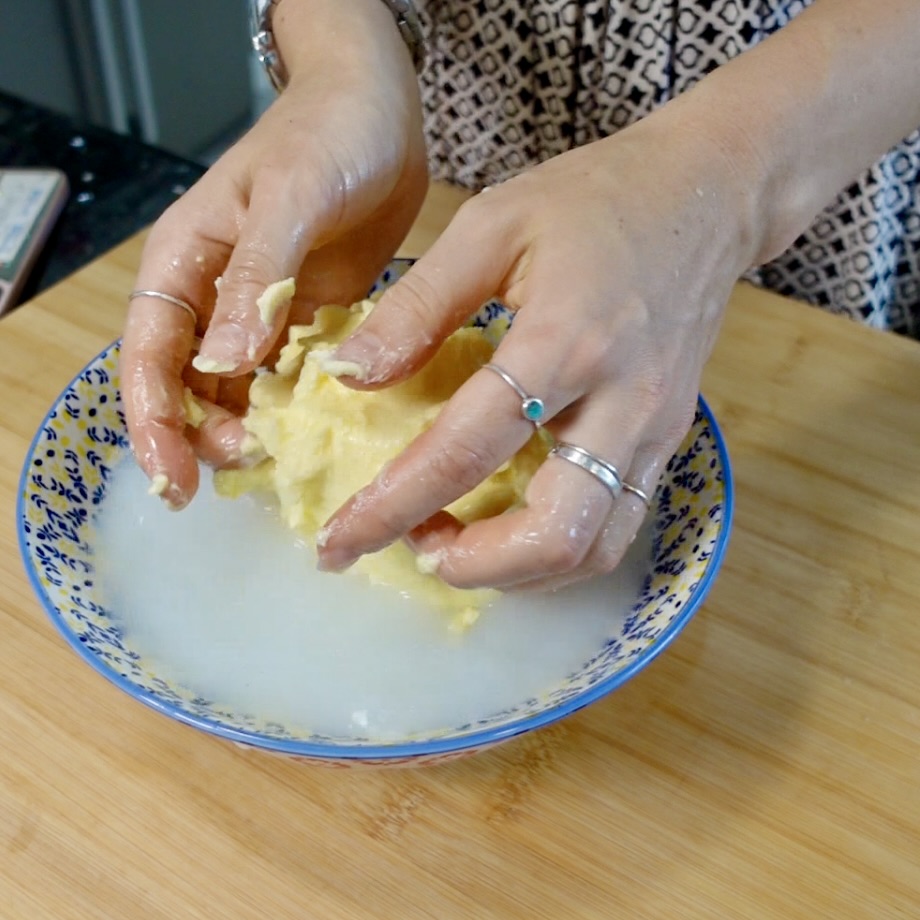
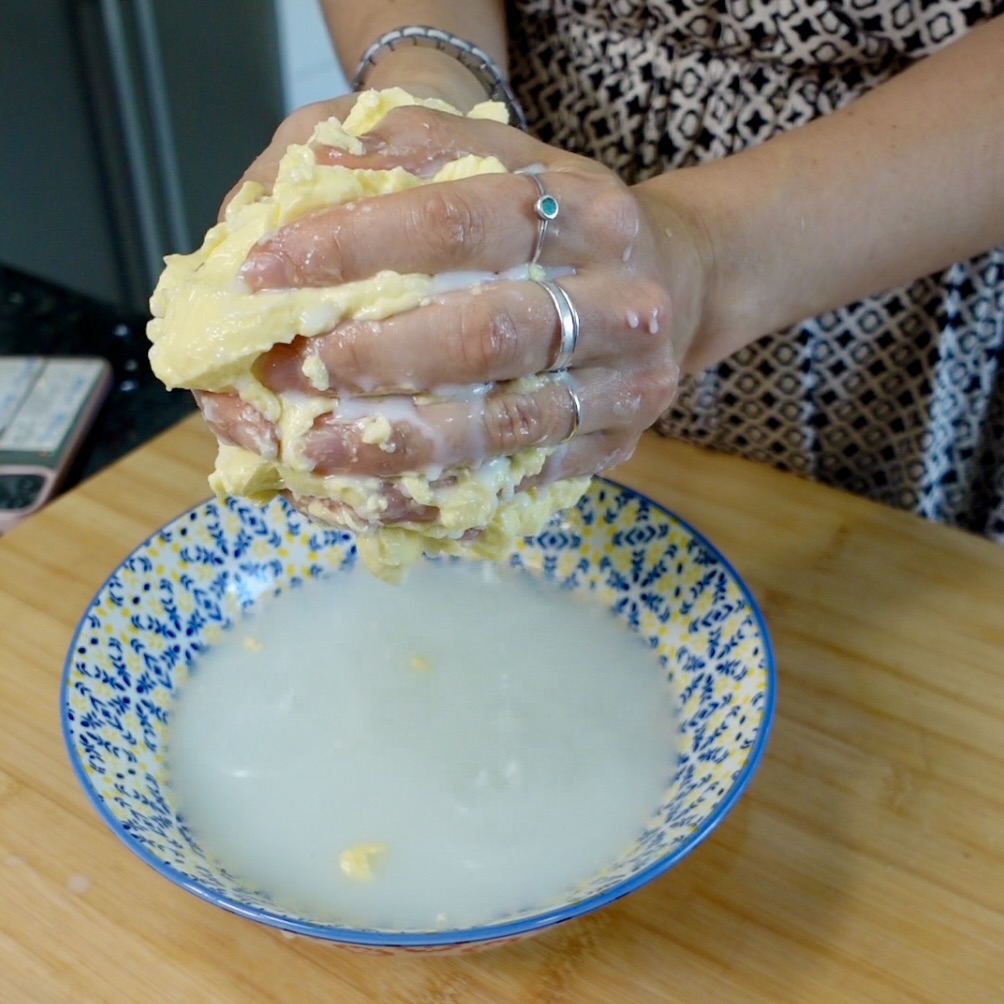
- Strain off the buttermilk (don’t throw it out!!) and add the butter to a large bowl filled with iced water.
- Squeeze and shape the butter in the water to make sure all of the buttermilk has been removed.
- At this point you can flavour it however you like - I usually add a pinch of salt but feel free to get as creative as you like, or just leave it as unsalted butter.